


Are you finally thinking about putting together your own website but don’t know where to start?
Or are your Etsy sales declining year after year, and you’re looking for a way out to something better?
I’ve always preached having your own website for a few reasons:
- you get total control over the style of your shop and your customers’ shopping experience
- you position yourself in a different class, away from Etsy “hobby shops” that underprice everyone in the market
- all your marketing efforts build up like equity does on a home (and you don’t have to share with other Etsy shops)
It’s also totally easy to do.
Especially now that you have this guide to help you build your own website in under an hour!
And without paying thousands of dollars to a web designer.
Enter Shopify.
You might have heard of Shopify by now.
If you haven’t, it’s one of the top favorite website builders for non-techie people.
You don’t need to know any coding and Shopify makes everything look beautiful for you with simple toggles and buttons.
And you don’t have to worry about how to get hosting, because Shopify hosts your website for you!
You can also purchase a domain name directly in Shopify. It takes minimal effort to get set up, you could do it in your sleep.
What I love about Shopify:
- Your website is automagically mobile ready
- 50% or more Internet browsers use their iPhones and Androids to shop online!
- Rest assured that your website will look and function great on mobile devices (this alone can cost hundreds to thousands of dollars for a coder to fix for you)
- You can sell digital or physical products
- This means you can get creative with your income streams
- Diversify your product offerings to meet the demands of your customers!
- You get ecommerce analytics
- You get to determine which of your marketing channels are bringing in traffic and sales
- What if you found out that all the time you spend on Twitter has resulted in zero sales? You would stop marketing on Twitter and focus on doing what does bring you sales!
- Your shop is search engine optimized
-
- You show up in search results more.
- The majority of online shoppers search on Google. You need to be sure you show up at the top when someone looks for your type of product!
- You can install add-ons for a robust and well-oiled machine
- There’s an add-on for almost every function you can possibly imagine for your shop.
- Installing them is as easy as point and click. (There may be additional fees.)
It’s important for you to know that Shopify is a paid subscription service.
There’s always a cost involved when you consider ease, good looks and functionality.
I recommend the $29/month plan for most people just starting out.
I use the $79/month plan, but don’t use this until you make enough sales per month so that this plan actually saves you money with lower processing fees.
Once you’ve selected a plan that works for you, here’s how you get set up.
Get ready for a zillion images. (I just want to be sure I’ve got you covered, and you’re not left wondering how to do any of this stuff.)
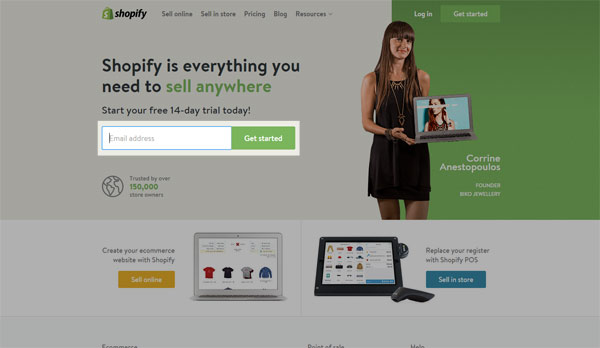
Go to Shopify (this is an affiliate link, and if you’ve found this post helpful, I would appreciate it if you use my link!) and begin by entering your email address in the highlighted box above.
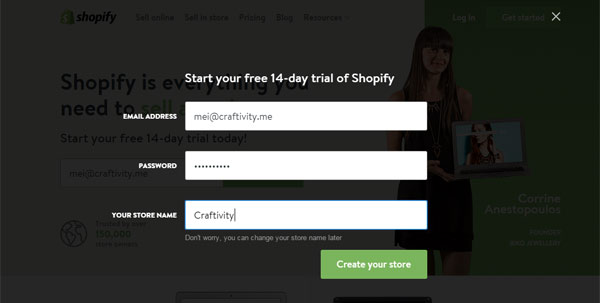
This pop up form appears. Fill in those details!
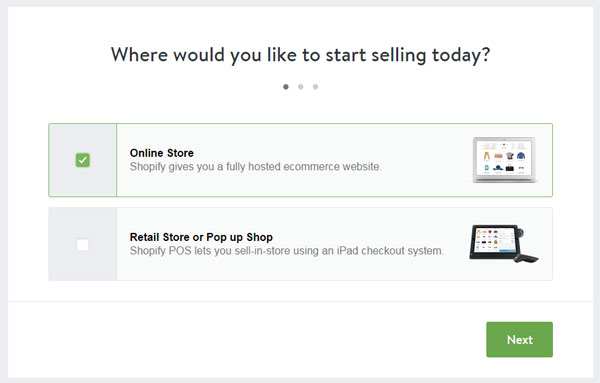
More questions. You’ll most likely select “online store”.
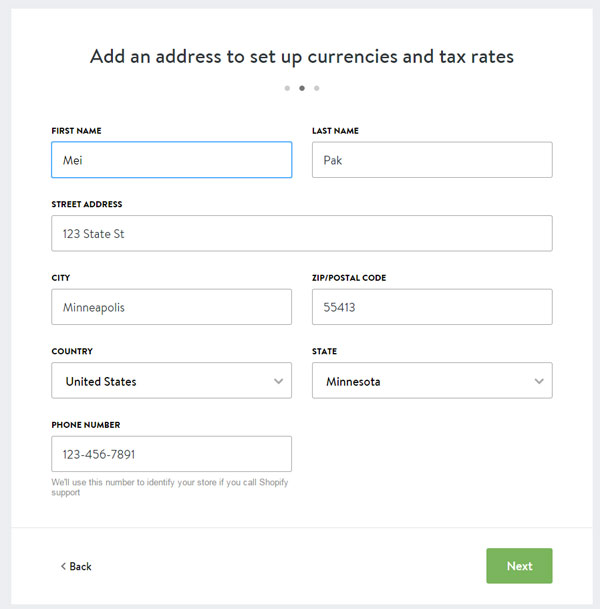
We’re almost done with the questions. Fill in all of your details here. Pretty self explanatory, right?
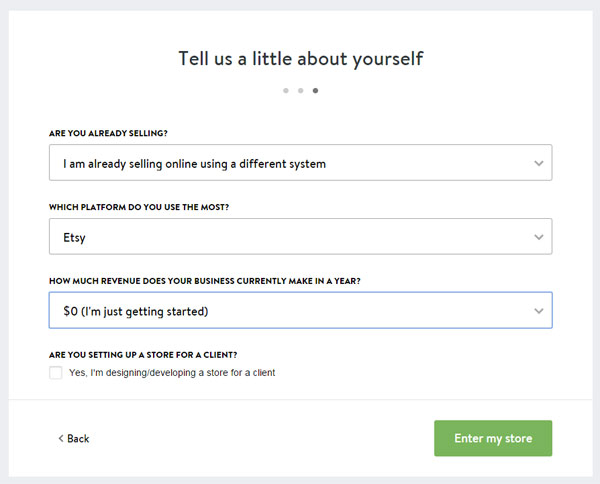
This part is just for internal research. Whatever you answer doesn’t change anything for you! Finally, click the green button: Enter my store.
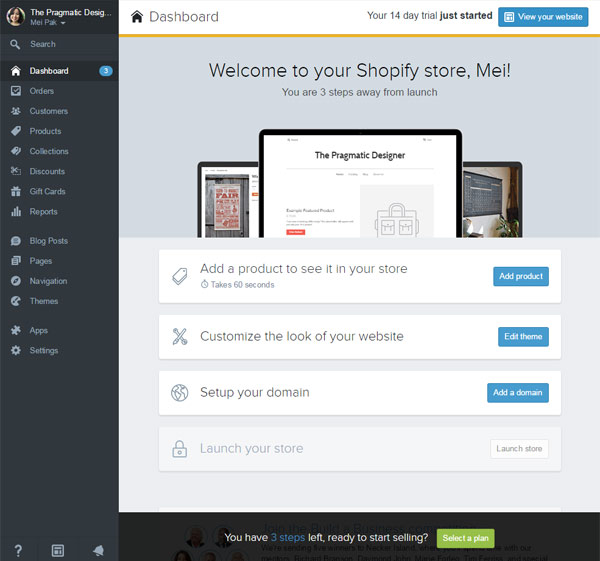
The image above shows you what your dashboard will look like. Familiarize yourself with the left sidebar navigation links. You’ll be using this often. Click on the “View Your Website” button on the top right corner, just to see what your website looks like out of the box:

This is what it looks like. We haven’t uploaded any products yet or changed any settings, so let’s do that!
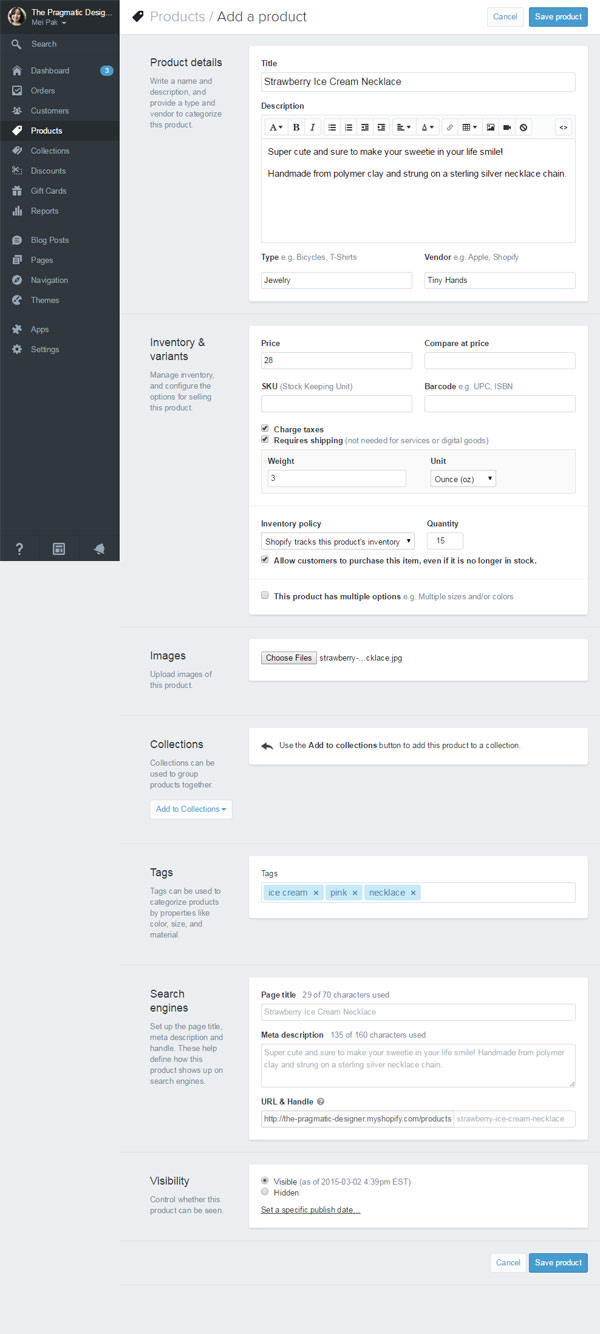
Go back to your dashboard. You’ll find “Products” on the left sidebar. Click on that. Then click on Add a product on the top right corner.
You’ll get this page where you fill in all the details of your product.
Title: Give your product a descriptive name.
Description: Explain the benefits and features of your product.
Type: What general category does your product fall under?
Vendor: Type in your own shop name
Price: How much will you be selling this product?
Sku & barcode: I normally leave blank unless you’ve registered your products
Charge taxes: You probably should!
Requires shipping: Yes, if this is a physical product!
Weight: How much does this product weigh? (Only necessary if you’re using weight-based shipping)
Inventory policy: Should Shopify help you keep track of inventory for this product?
Allow customers to purchase this item, even if it’s no longer in stock: Can you make your products on demand?
This product has multiple options: Different sizes, lengths, colors, etc.?
Images: Upload your product images (see here for a great tutorial for photographing your products)
Collections: Categories that you’ve set to organize your products
Tags: Just another way to categorize and group similar items
Search engines (Page Title, Meta Description, URL): Leave the same
Visibility: Visible, unless you’re not ready to make it public yet
Finally, Save Product!
![]()
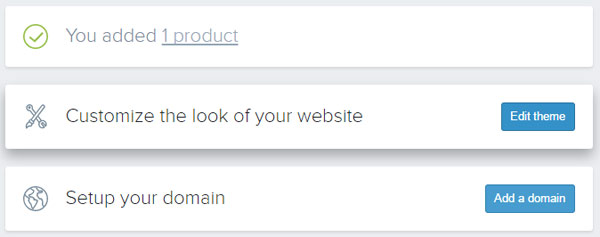
Congratulations! You’ve just added your first product. Click the proceeding link to go back to your dashboard.
Next up. Let’s customize your website’s appearance! It’ll be super easy, I promise.
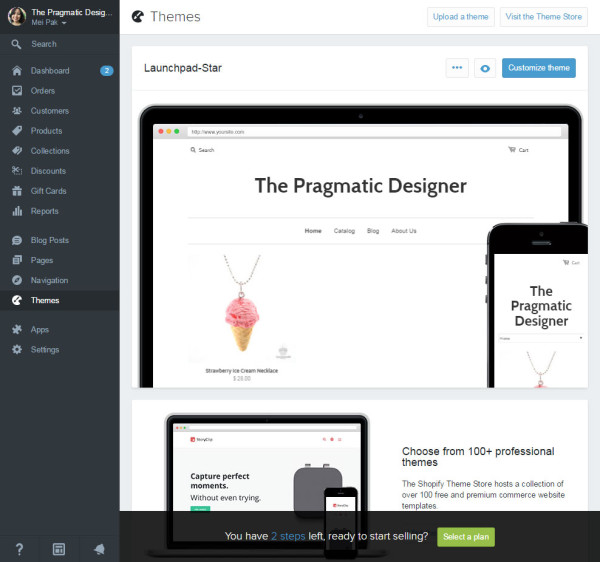
A “Theme” is like a skin that you put on your website to give it a certain look. Shopify comes with hundreds of free and paid themes that you can use. The image above shows you the current theme you’re using. You probably want to make it look a bit more interesting.
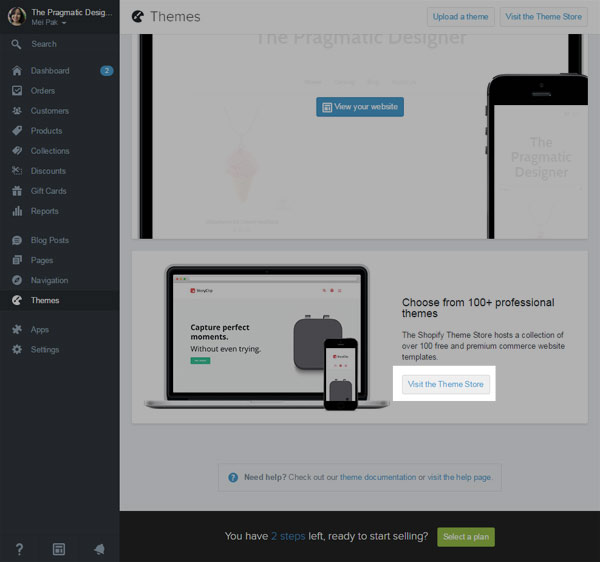
Scroll down a little until you see the “Visit the Theme Store” button. Click it!
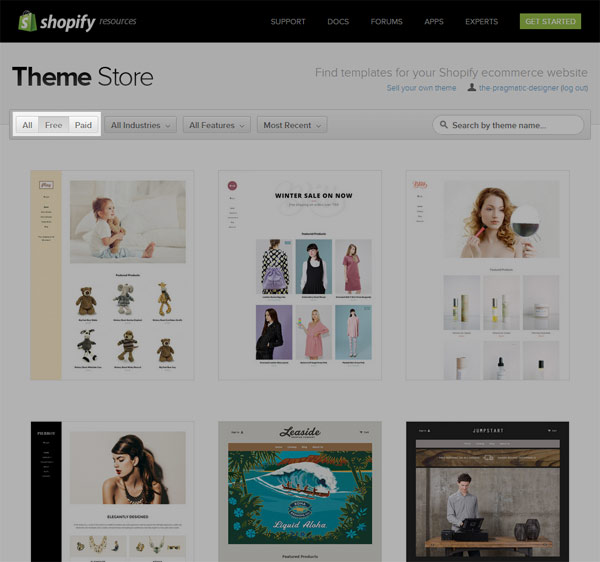
This will open in a new window. At the top left corner, click on “Free” so you only see the free options. (Unless you have the funds for a cool paid theme!)
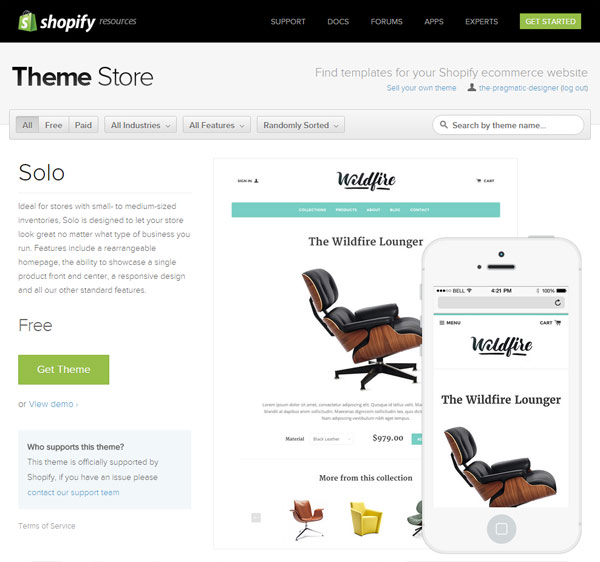
Here’s a theme I like called Solo. You can “View demo” to see a website with this theme on. Click on the green “Get Theme” button.
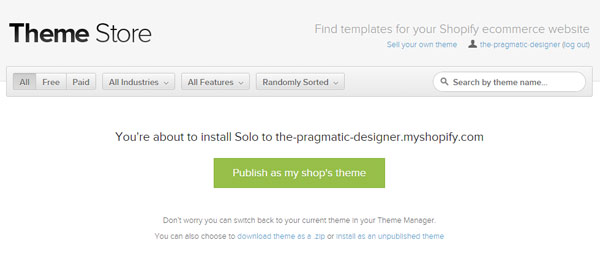
Shopify will ask for confirmation. Click “Publish as my shop’s theme”.

It’ll take a few seconds. When it’s finally done installing, go back to your Theme Manager.
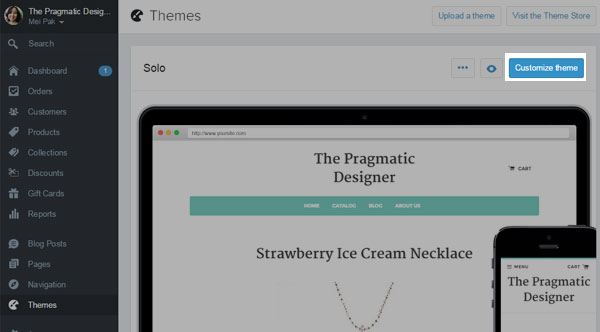
In your Themes page, there is a blue “Customize Theme” button on the top right. Click on it to further customize the colors, fonts and more!
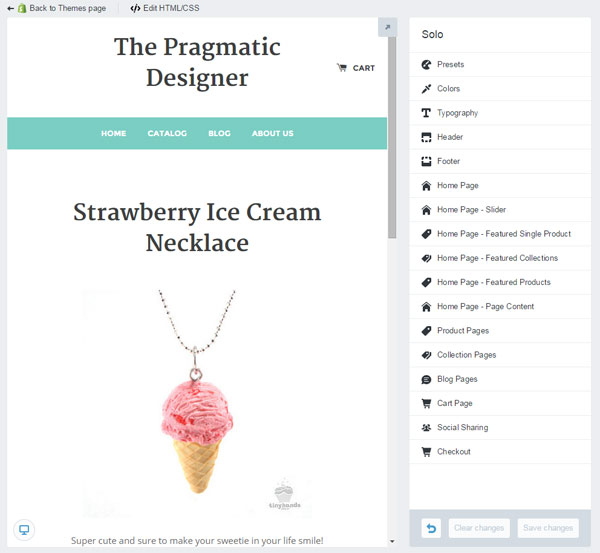
This is your theme editor. See? No code! Not so scary, right?
On the left is a preview that shows what your website looks like. Whenever you change a setting on the right, the preview on the left will reflect any of those changes.
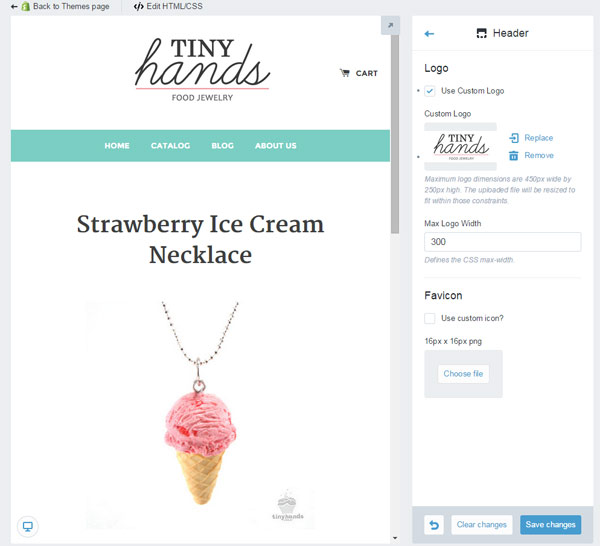
Click on Header on the right sidebar. You’ll be able to upload your own logo! Don’t forget to Save Changes as you go.
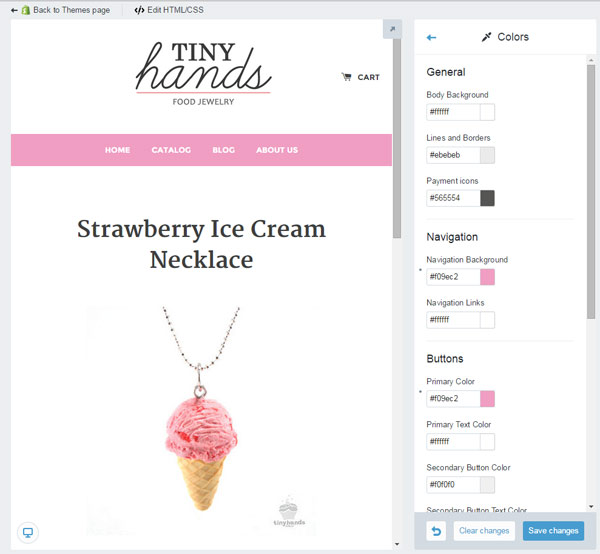
Next, click on Colors on the right sidebar. Instead of teal, I want pink to match my branding better. Just click on the colored squares to select your color from the color wheel. Save changes!
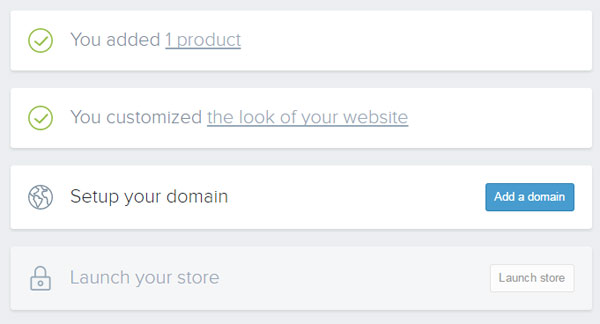
Go back to your dashboard or click on the “Back to themes page” on the top left corner. On your dashboard, you’ll now see the screenshot above. Now it’s time to add a domain name!
A domain name is basically the “www.yourshopname.com” URL.
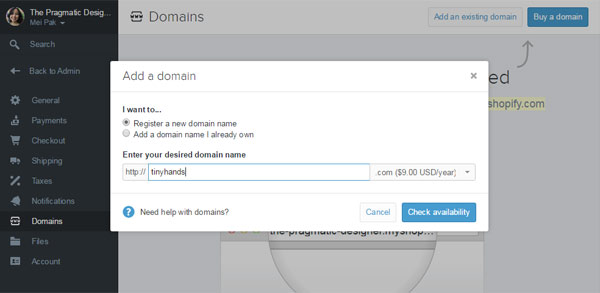
On the top right, click on “Buy a domain”. This pop up appears. Select “Register a new domain name”, then enter your domain/shop/brand name and “Check availability” to see if you can buy it.
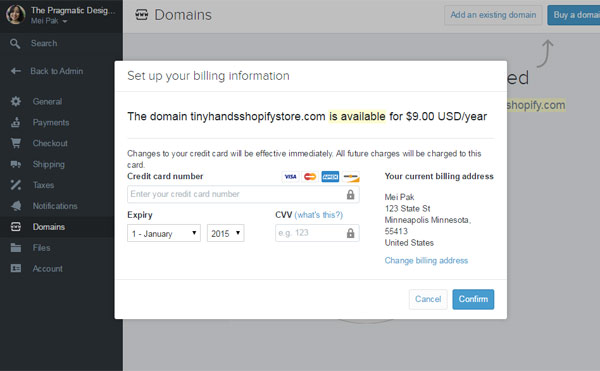
Your domain name is available. Awesome! Now you just need to pay for it. $9.00/year is a pretty good price.
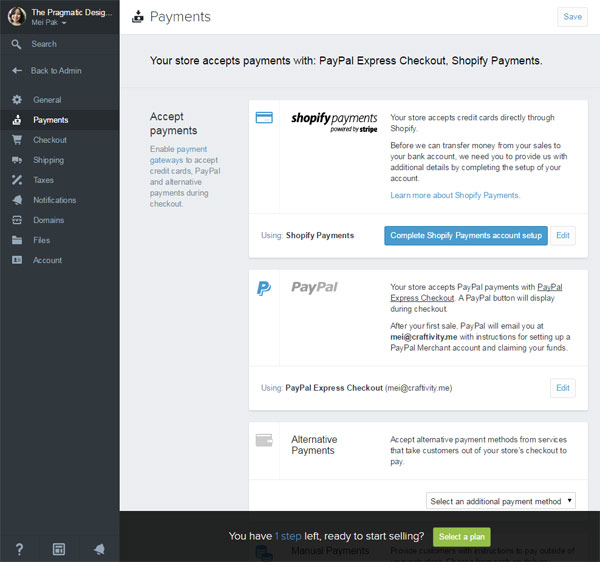
We’re almost done. Next, we’ll want to be sure you can accept payments! Click on “Payments” from the left navigation bar. Let’s use Shopify Payments to accept credit cards. You’ll need to set up your account first though. Click the blue button that says “Complete Shopify Payments account setup”.
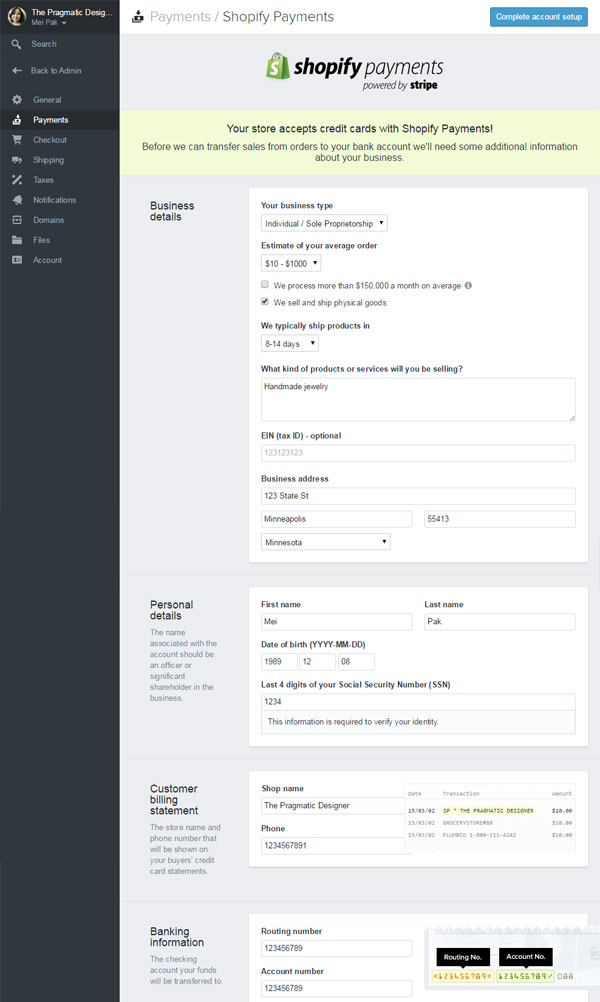
This page asks you details about your business. Fill it in to the best of your ability.
Your business type: Unless you registered for an LLC, corporation or partnership, you’re probably an Individual/Sole Proprietorship
Estimate of your average order: It’s just an estimate
We typically ship products in: What’s your turnaround time?
What kind of products or services will you be selling? Give a brief description
EIN: Your employer’s identification number – enter it if you have one!
Business address: Or your home address if you run your business from home
Personal details: Only you know this stuff!
Shop name and Phone: This shows on your customers’ credit card statements (get a Google Voice phone number if you don’t want to give out your personal phone!)
Routing number and Account number: Both can be found on your check book.
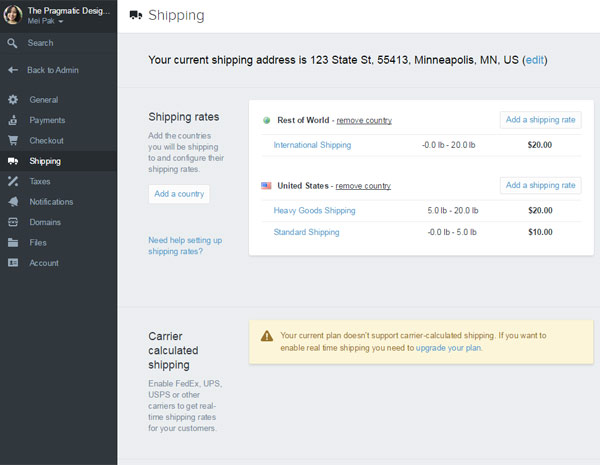
Next, we need to set up shipping! On the navigation bar to the left, click on “Shipping”. There will already be a few premade shipping rates. Click on “Add a shipping rate” under the respective country/location.
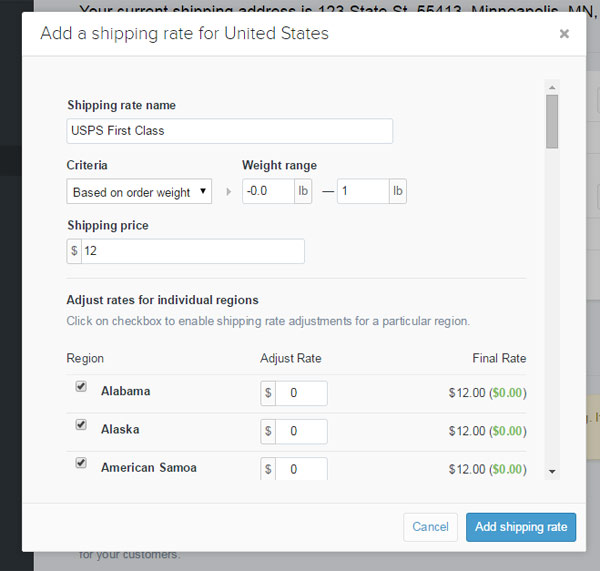
This pop up appears. You can set shipping based on how much the order weighs or is priced at.
Give your shipping rate a name (your customers will see this) and a price.
You can even adjust the shipping price on select states.
Click on the blue button “Add shipping rate”.
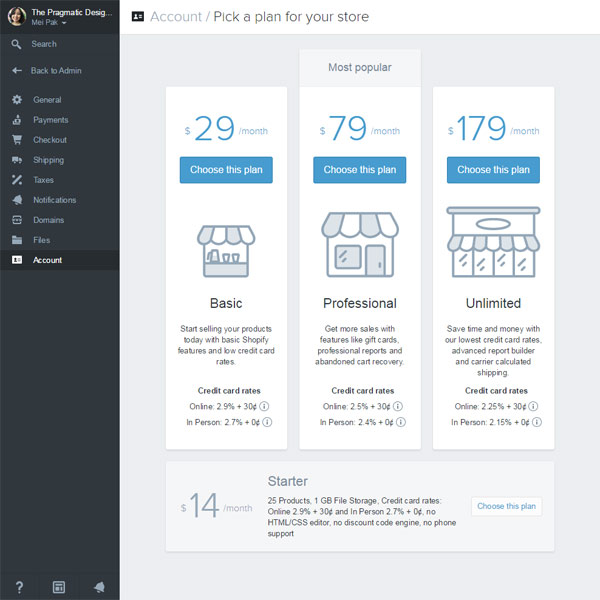
The last step is to select your plan. I recommend the $79/month plan. Click the respective “Choose this plan” button.
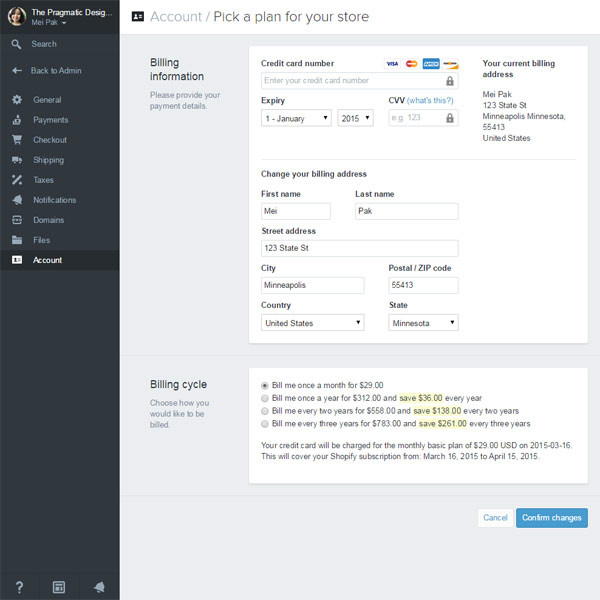
And enter your credit card and billing information. You can save some money by prepaying for the entire year or for a few years in advance.
As a small business owner, I tend to go for monthly payments. Even though I end up paying more, it’s easier on my cashflow.
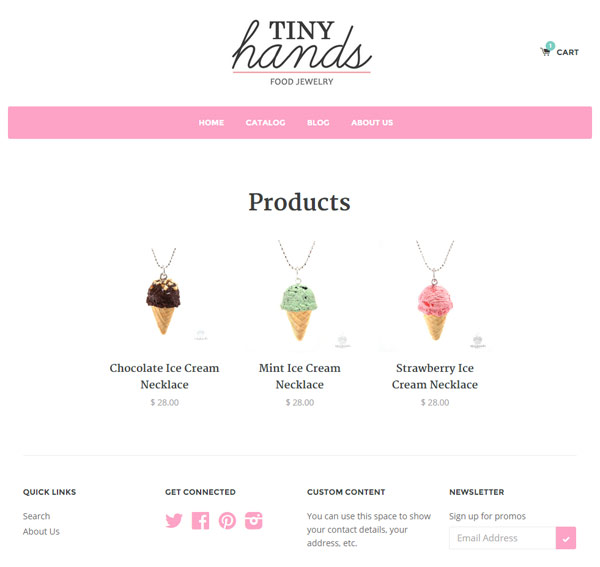
Now you can “Launch” your store, and go to your domain name to see your website! Here’s what mine looks like.
You now have a fully functioning online website that you can sell your products on and take credit card payments!
Let me know if you have any questions!
I do my best to show you every step of the way to setting up your own website.
But if I missed anything or if you have any questions about Shopify, please don’t hesitate to let me know in the comments below.


Unlock a Profitable Handmade Business
in Just 12 Weeks Without Using Etsy
or Social Media


FREE WORKSHOP
This workshop is for anyone who makes and sells a handmade or physical product, including jewelry designers, artists, paper designers, bath & body product makers and more!
What You'll Discover
The #1 mistake people make with Etsy & social media that causes shops to FLOP
The secret to making it with your handmade shop so it's no longer just a hobby
How to make sales in your handmade shop with ease so you can finally get to 6-figures
TAKE ME THERE


Your email address will not be published. Required fields are marked *