


How to Create a Wholesale Linesheet in Microsoft Word or Pages for Mac


Over at the Academy of Handmade, I wrote a post on 5 things to consider before you jump in and do wholesale.
If you’re inspired and you think you’d like to take wholesale on, awesome!
I’m right here with you on that and think it’s a great source of income.
Here’s a list of the 7 steps you need to take to turn on your wholesale game.
One of those steps is creating your wholesale linesheet.
But if you’re not quite sure how to create a wholesale linesheet, here’s a technical how-to for non-techies:
Using just Microsoft Word or Pages for Mac, you can create a wholesale linesheet that is super easy to set up and maintain.
You don’t need to pay for a subscription or service, you don’t need to hire a graphic designer.
All you need to do how to do is insert tables and photos, which I promise is as easy is making text bold or center aligned.
This tutorial will show you how to make your wholesale linesheet in Word, but the same concept applies to Pages so it’s easy to translate for Mac users!
Bonus: Download my free editable wholesale order form template to go with your linesheet!
Getting started
The first thing you want to do is open Microsoft Word (or Pages) and create a blank document.
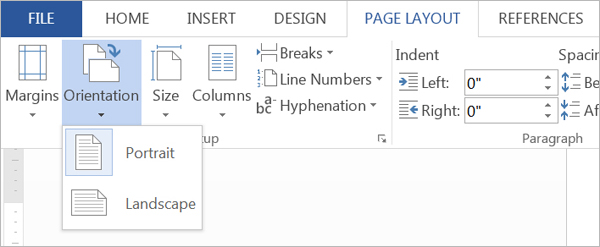
Then decide on a size for your linesheet and your page orientation.
For size, I would recommend with the standard printing paper size of 8.5 x 11″ or half of that which is 5.5 x 8.5″.
You can set your own size too.
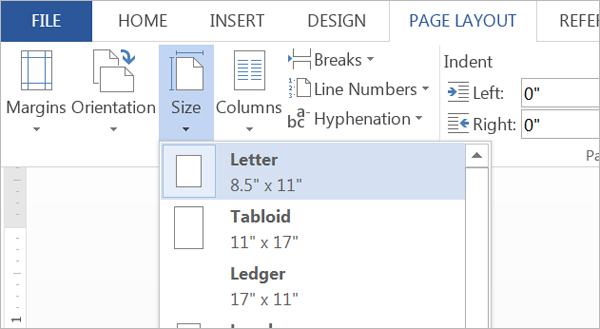
Your orientation could be vertical or horizontal, that’s up to you!
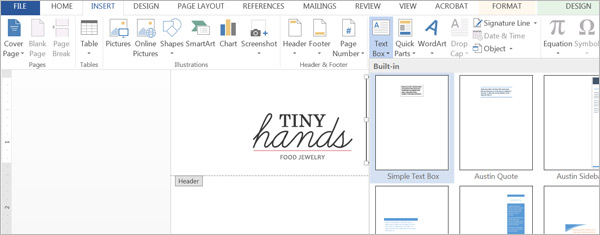
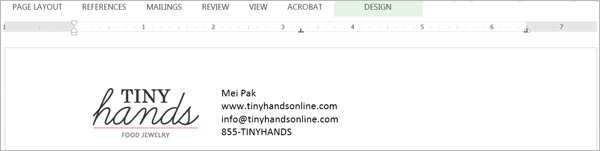
Add in your logo, contact info and page numbers
You can do this by going to the Insert tab and insert a Header. The default or first option will work.
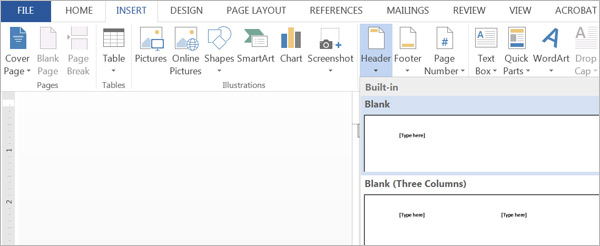
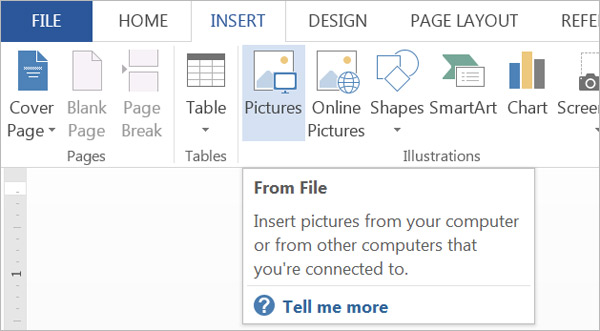
Then insert a Picture and browse to the location of your logo.
This will insert your logo into your header and every additional page you make will include this logo.
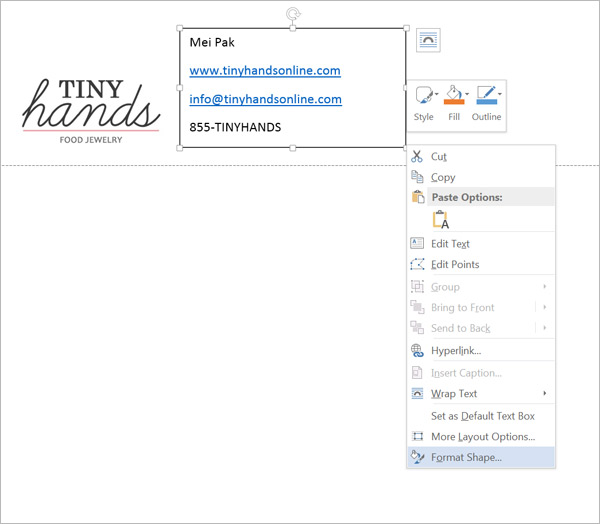
Then you can insert a Text Box to enter in your contact information so stores will know how to reach you or submit orders.
Once you’ve filled in your contact information, you’ll need to remove the border on the Text Box (and also remove the background color – even though the white matches the current background).
Do this by right clicking on the corner of the Text Box and select Format Shape from the menu that appears.
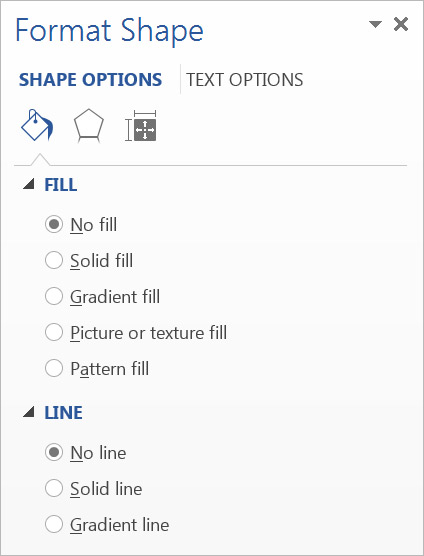
The screen below will appear on the side.
Fill is the background color for the Text Box.
Line is the border, which is black by default.
Select “No Fill” and “No Line” for both.
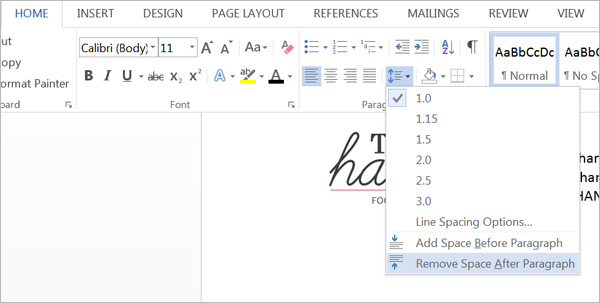
To make the contact info in my Text Box look even better and fit with my logo, I removed the “space after paragraph” and changed the blue links to black text.
My header now looks like this, and it will be the same for every page after this!
It would be a good idea to add automatic page numbering on the bottom of your pages as well:

I like using the “Page 1 of 1” format because the store owner will know how many pages to expect in your linesheet and know if a page is missing. No surprises here!
Getting your products in there
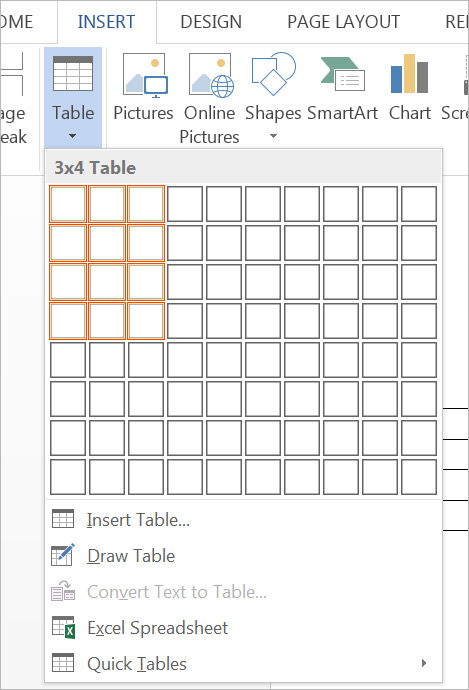
To get your products in your linesheet, you’ll first need to create the structure for it!
Go to the Insert tab and insert a Table. Each product goes into their own little box, so in the above example (see the orange boxes), there will be 12 products – 3 across and 4 down. You can decide how many products you want to go in each page.
Once you’ve inserted your table, click your mouse inside the first top left box (these little boxes are called “cells”).
Then Insert a picture of your first product! You do this by going to the Insert tab, and select Pictures, just like how you did for your logo at the top of the page.
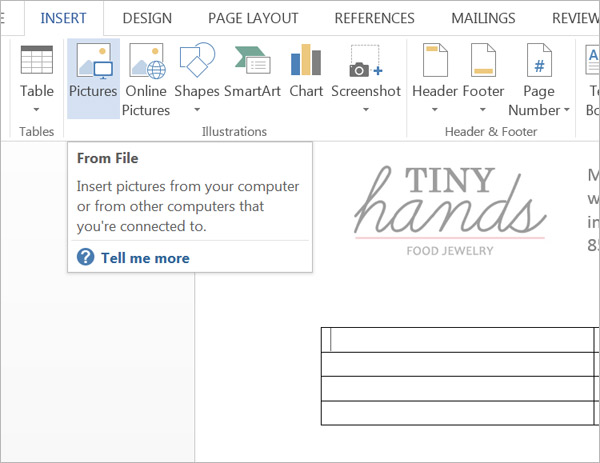
Make sure the photos you’ve selected are all the same size!
Next, click in the next “cell” or box, to the right of the one you were just in. Insert a photo in there too.
Rinse and repeat until all your products are in the page!
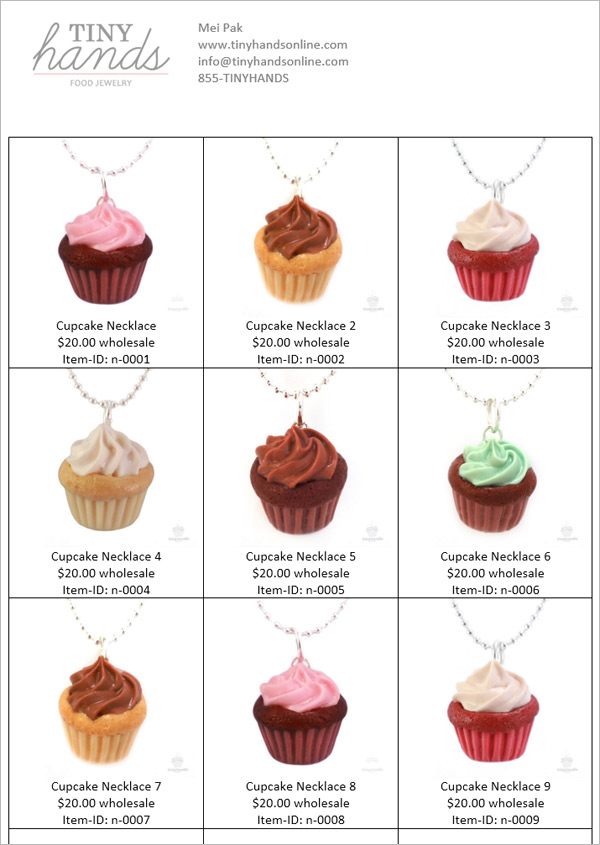
You’ll now have something that looks like this:

Add product information
You’ll now need to add product info like:
- Product name
- Price
- Size
- Item ID
To do this, click inside a cell just to the right of your product photo. Hit Enter to start a new line. And start typing!

Repeat for all your products.
You’ll then have something that looks like this. We’re getting close!
Finishing up…
This next step is the magic key to turning this into something super beautiful!
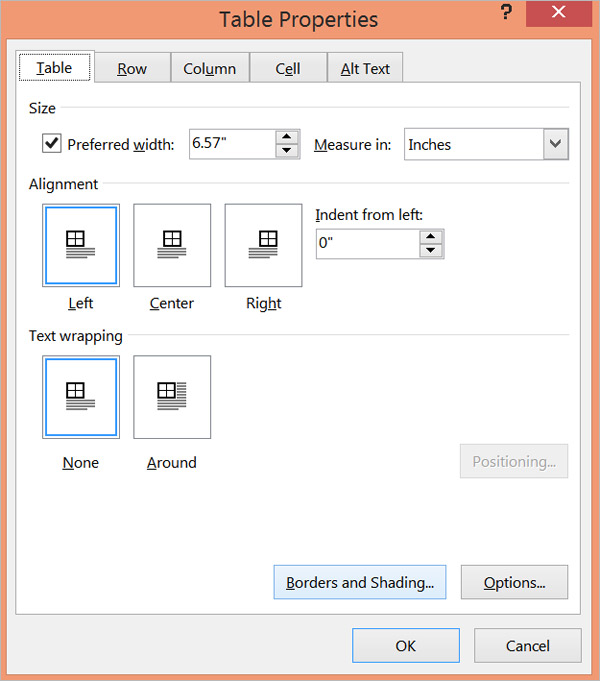
We’re going to remove all the black lines. Right click anywhere inside your table and select Table Properties from the menu.
A window will appear. Click on Borders and Shadings at the bottom.
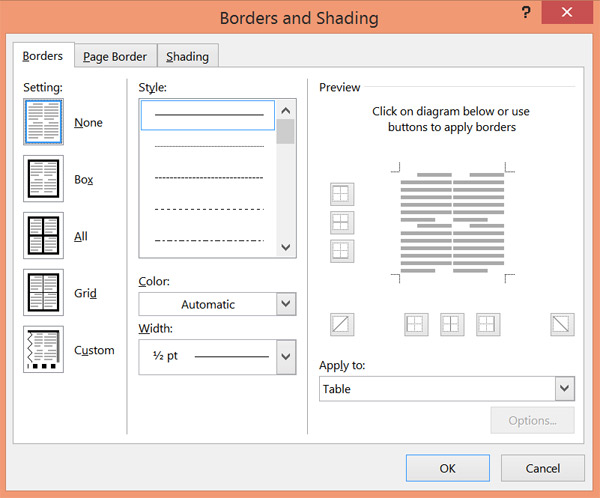
In the new Borders and Shading window, click on “None” to remove ALL the borders!
This will feel so satisfying!
Here’s what we have now, in all its glory:

Saving your file
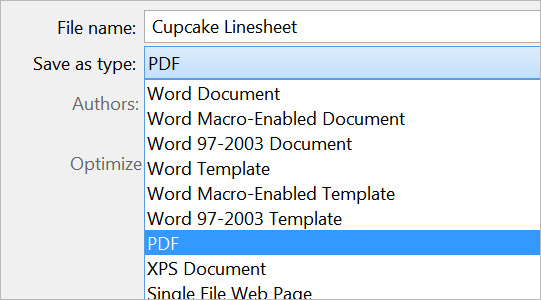
Save your file first as a Word document. This makes it editable so you can update your linesheet easily in the future.
Then Save your file again as a PDF file so you can email your linesheet to stores or send your linesheet to printing services.
To save as a PDF, Save As the file and under “Save as type”, select PDF from the menu.
And there you have it.
Bonus: [thrive_2step id=’5222′]Download my free editable wholesale order form template[/thrive_2step] to go with your linesheet!
Grab my free editable wholesale order form template on your way out
[thrive_2step id=’5222′]


Unlock a Profitable Handmade Business
in Just 12 Weeks Without Using Etsy
or Social Media


FREE WORKSHOP
This workshop is for anyone who makes and sells a handmade or physical product, including jewelry designers, artists, paper designers, bath & body product makers and more!
What You'll Discover
The #1 mistake people make with Etsy & social media that causes shops to FLOP
The secret to making it with your handmade shop so it's no longer just a hobby
How to make sales in your handmade shop with ease so you can finally get to 6-figures
TAKE ME THERE


Your email address will not be published. Required fields are marked *