


Have you ever wondered how other people get such perfect shots of their products?
The ones where the product appears to be floating off the page?
With a seamless white background? Yeah, that one.
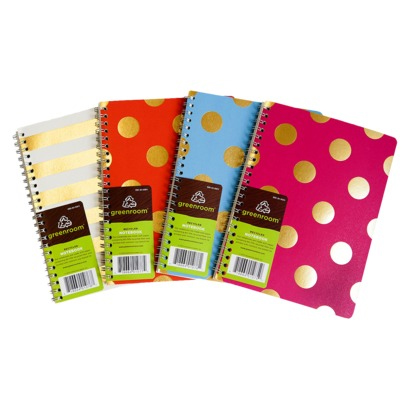
You see these photos on top brands like Paper Source, Burt’s Bees, ModCloth, Nordstrom and more.
I’m going to show you how you can take your own product photos on a white background in this super easy and affordable set up!
Why white product photos?
But first, why is it the industry standard to have product photos on white?
- Firstly, they present your products with the least distractions.
Online shopping is completely normal these days, but for a lot of us, we want to know what we’re getting in the mail.
It’s your responsibility as the seller to represent your products with accurate photos of them.
- Secondly, they’re media friendly, which means you’re more likely to be featured in a popular blog or magazine.
As an editor of a blog or magazine, part of their job is seeking for cool products to feature.
Editors always want white background product photos so they can easily include your item on their magazine or website, without doing tons of editing.
- Thirdly, they give your shop a more consistent look.
This makes customers feel that you’re professional and increases trust in shopping with you.
I have critiqued dozens of Etsy shops and the number 1 reason for lack of sales is the poor quality of photos.
Don’t make that mistake. Re-photograph your products if you need to. It’ll be worth it!
What you need and where to get them
-
- Lightbox
- A lightbox is made with white see-through material to allow for light to shine through, but softens direct light for minimal shadows (yay!)
- get them for cheap on Ebay ~$15-20
- or make your own with a cardboard box and white fabric (downside is it’s not collapsible, but does the trick!)
- Clamp lights
- home improvement store like Home Depot, Lowes or Menards ~$10 each
- get three clamp lights
- 100 watt daylight light bulbs
- home improvement store or Target ~$7 each
- get three, one for each light
- Camera that allows you to configure settings
- A tripod is optional
- Place for you to set up and clamp on lights
- Photo editing software
- Lightbox
Misconceptions about photographing your products on white
I also want to mention a few misconceptions on this process of taking product shots on white background.
- You don’t need a fancy, expensive DSLR camera to take great photos. I can take perfect product photos using just my iPhone 5!
- You don’t need sunlight at all. You can literally snap your photos in a dark room.
- You will need to edit your photos using photo editing software – so don’t expect them to look perfect from the get go.
- You won’t need to buy Photoshop for your photo editing software, there are great free ones you can use!
How to set up your equipment

Here are some photos of how I set up my cheap (and totally not classy) lightbox.
It will be tricky to find a spot to clamp on the lights, but consider dragging over chairs, furniture or storage bins (with stuff inside for the weight).
From the photo above, the left and right lamps are clamped on to the pink chair. The top light is clamped on to the closet shelf fixture.
A few rules to ensure your photos turn out perfect:
- Use three lamps, one on top, left and right for the best light
- Insert a piece of white paper or cardstock behind your product
- Turn off all other light sources in the room (including sun light) so that the lighting in your picture is consistent
- When you are starting out, snap more photos than you think you’ll need.
- Don’t use flash!
Jewelry hack: To hang necklaces in the lightbox, I poke through two headpins and curve them into hooks for hanging the necklace! (See photo above.)
Camera settings- ISO, white balance, F-stop,
Now that you have everything set up, you’re ready to start snapping some photos like the paparazzi!
We need to configure your camera so that it takes the best shots of your product.
Don’t be scared of this step, I’ll help boil down the technical stuff down to easy-to-understand concepts!
ISO, aperture and shutter speed are three settings that are just different ways that control the brightness of your photos.
- ISO: the higher the number, the brighter the photo but the lower the photo quality (you’ll get lots of grains called “noise”)
- ISO examples: 200, 400, 600, 800
- Aperture: the lower the number, the brighter the photo but the less out of focus your product is
- Aperture examples: f/2, f/2.8, f/5.6, f/8
- Shutter speed: the smaller the number under “1”, the brighter the photo but the more sensitive your camera is to hand movement causing blurry photos (if not using a tripod)
- Shutter speed examples: 1/250, 1/60, 1/30, 1/5
White balance is the fourth setting you need to know.
It sets the white hue of your photos. Setting the wrong white balance can make your photo look too blue or orange. We want it just right!
White balance settings are not always the same from camera to camera.
I recommend you take one photo using each of the different white balance options.
This way you can look at which photo turned out the best – and memorize that!
Consult your camera’s manual to check how you can configure these four settings.
Practice, practice, practice.
The first few times, you’ll feel confused and slow at taking photos.
Once you find that perfect configuration, write it down or memorize it (just make sure your set up is always the same, or your settings may change).
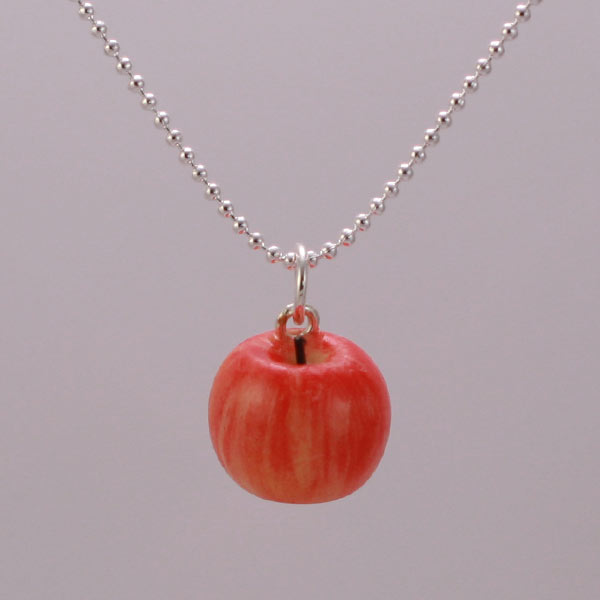
Voila, the unedited photo straight out of the camera
Something I didn’t understand when I was first starting out, was I kept getting grey photos like this.
I could never achieve the flawless white background straight out of the camera.
As I mentioned earlier, you will need to edit your photos later. There’s no way around it!
This apple necklace photo is how your photo should look as well.
In a follow up post, I’ll show you exactly how to edit your photo to get that white background and in under ONE minute.
Questions, comments, concerns?
Leave me a comment if you have any resources or tips to share!
And if you have questions or comments, be sure to let me know too so I can help.


Unlock a Profitable Handmade Business
in Just 12 Weeks Without Using Etsy
or Social Media


FREE WORKSHOP
This workshop is for anyone who makes and sells a handmade or physical product, including jewelry designers, artists, paper designers, bath & body product makers and more!
What You'll Discover
The #1 mistake people make with Etsy & social media that causes shops to FLOP
The secret to making it with your handmade shop so it's no longer just a hobby
How to make sales in your handmade shop with ease so you can finally get to 6-figures
TAKE ME THERE


Your email address will not be published. Required fields are marked *